
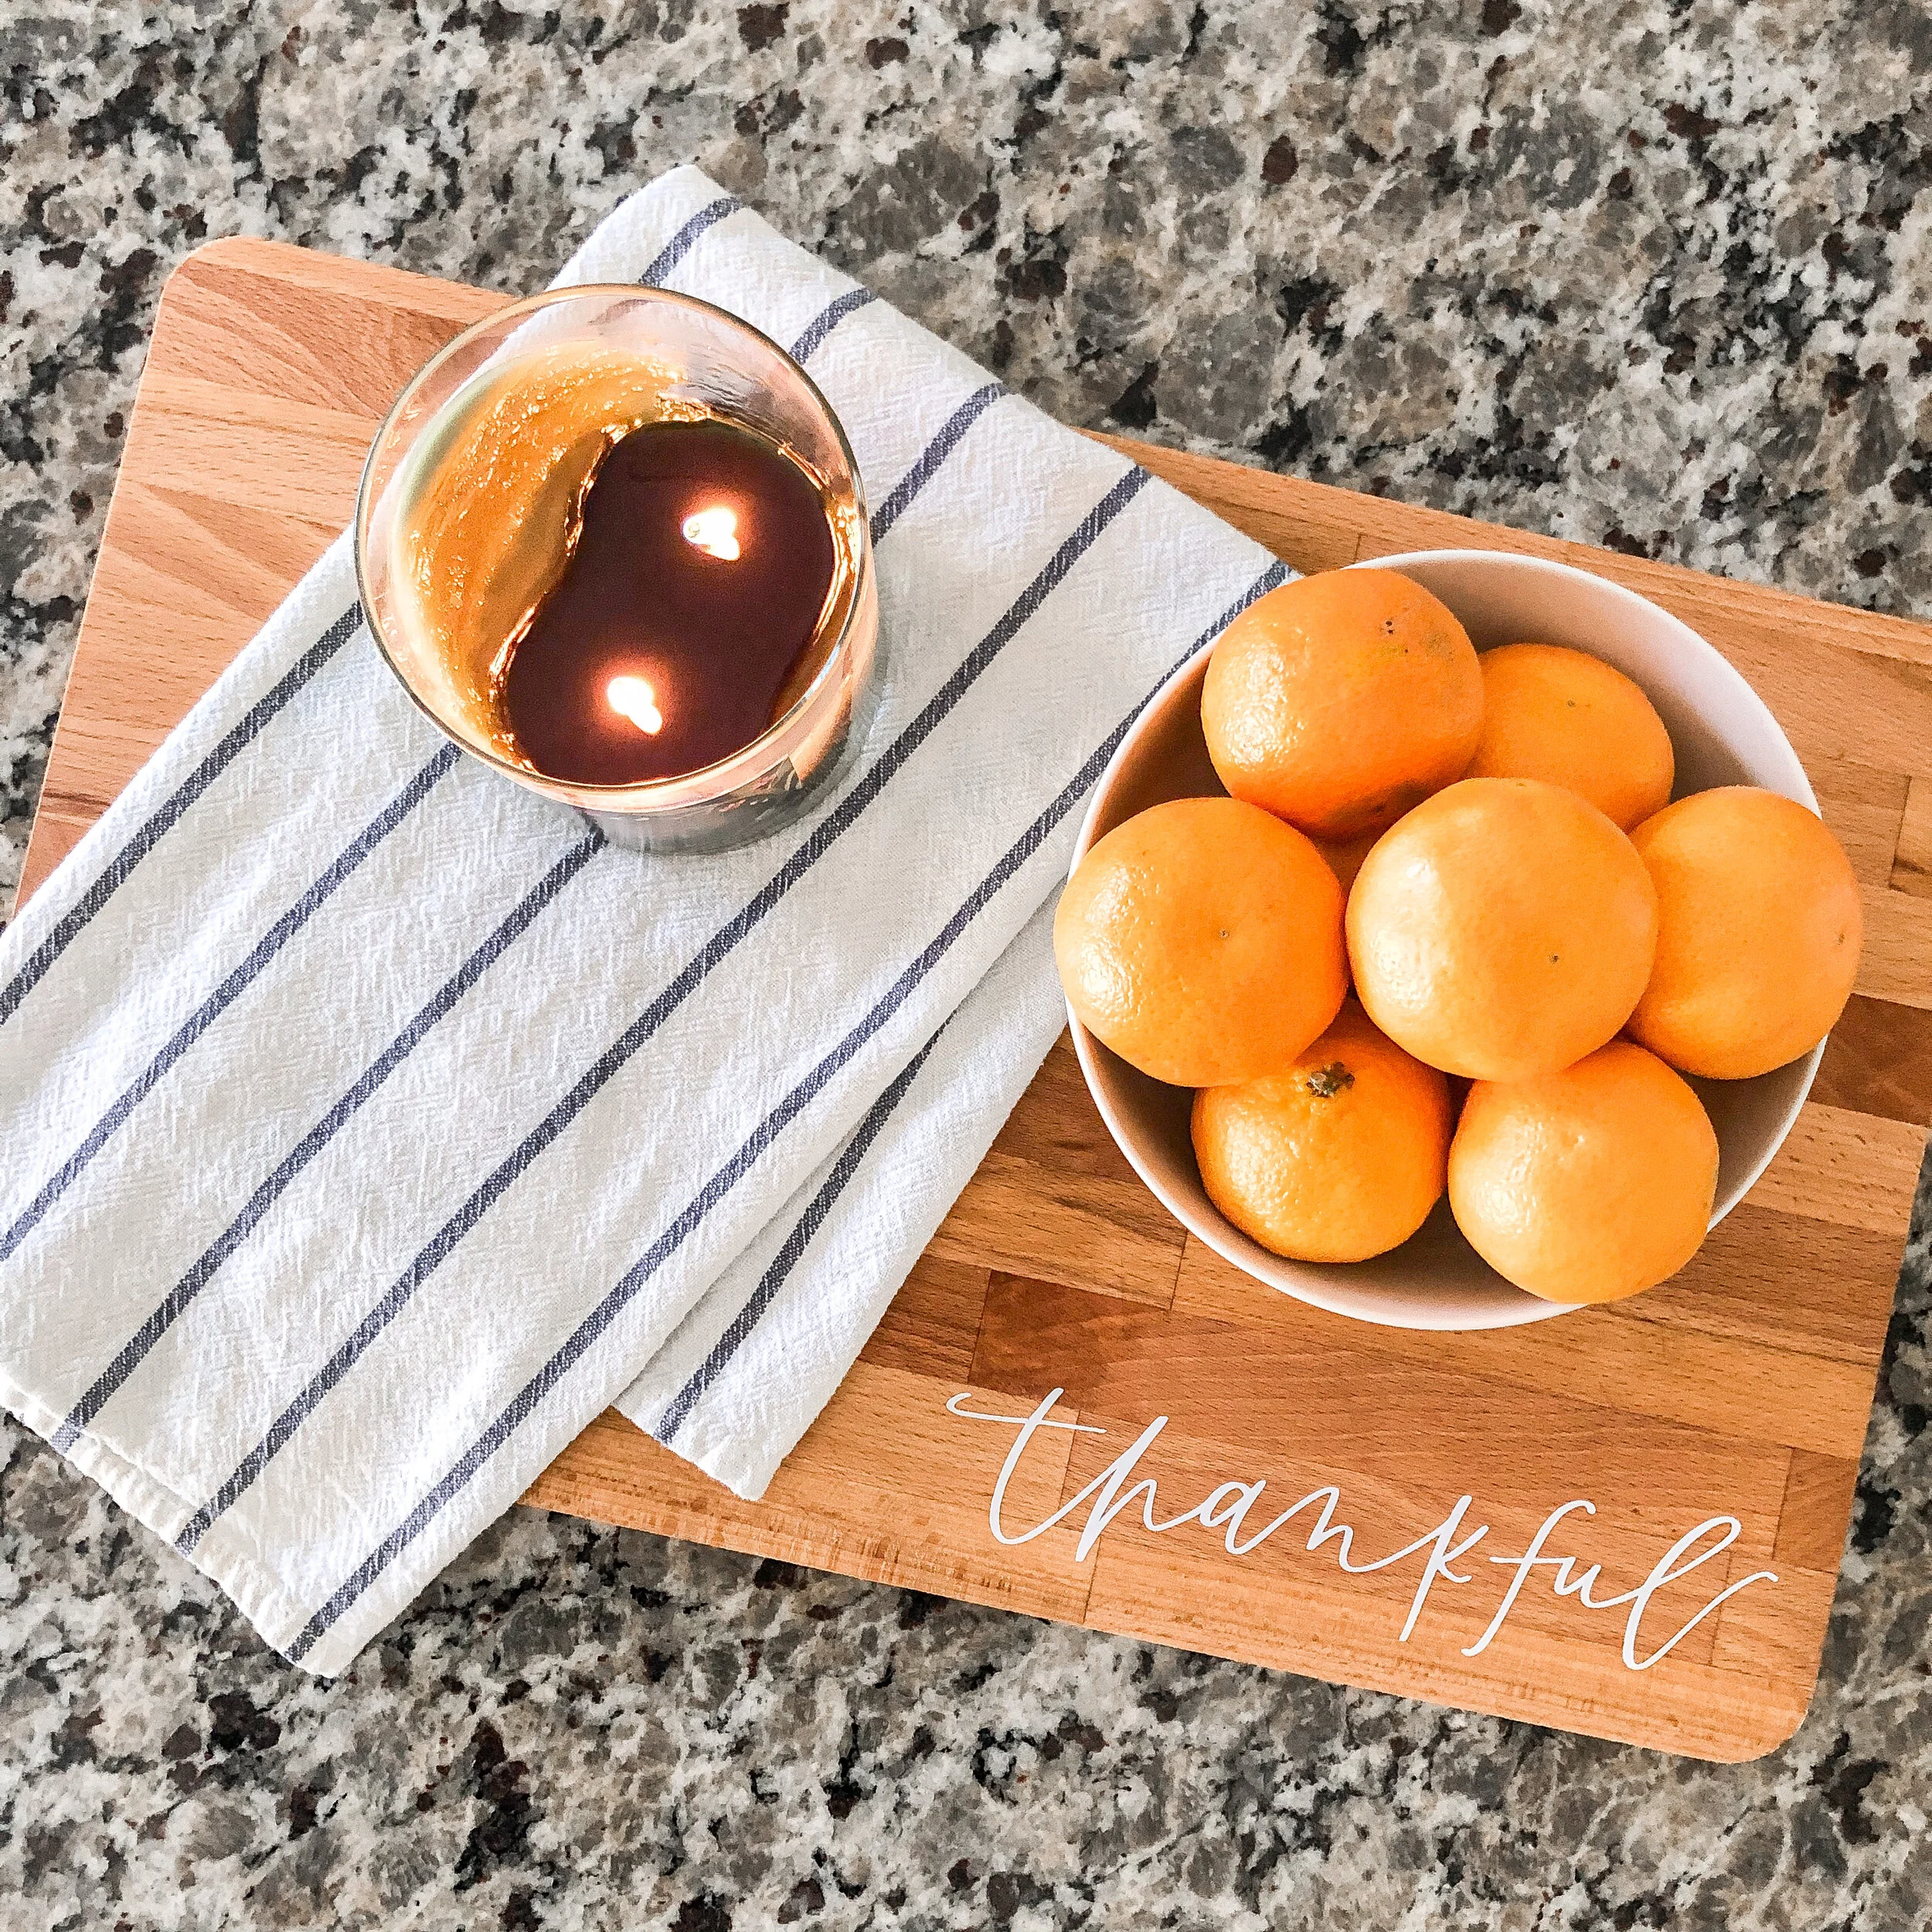
Hand Lettered Thankful Serving Tray

Happy Turkey Day! Here’s a quick little DIY to add something special to your table!
This hand lettered “thankful” cutting board also doubles up as a simple serving platter! It’s perfect for a hostess gift or festive way to add some fun to your own table this Thanksgiving!
Grab a cup of your favorite cozy beverage & let’s get started!
You’ll Need:
Cricut cutting machine (I have the Cricut Explore Air 2)
White adhesive vinyl (I love Oracal 651 by Expressions Vinyl)
Wooden cutting board (I have this one from IKEA)
Optional Step: Design On the iPad - skip down to “Step One” if you already downloaded my “thankful” SVG!

Before hand lettering a design, I always take a picture of the product that I want the lettering to be on first. You can then upload the photo into the Procreate app on your iPad Pro, add a new layer on top of the photo, and begin lettering. This way the design is proportional to how you want it to look in the end!
For more tips on hand lettering on the iPad Pro, check out this blog post.

Once you’ve finished hand lettering, save your design as a PNG file and export it to your computer.
Step One: Cricut Design Space
Open Cricut Design Space on your computer & Click “New Project”

Once you get to the blank Canvas, click “Upload” at the bottom left to upload your design.
Here you can choose a design you’ve previously upload, or you can upload your new design. Today we’ll click “Upload Image” since we’re uploading our new “thankful” design.

A new window will open where you can either drag & drop your SVG or PNG file, or browse your computer to find the file you sent that way.

You’ll be prompted to select the image type, since it’s just black hand lettering we’ll click “Simple” & “Continue”.

You won’t need to do anything in the next wndow since the png alredy has a transparent background. Click “Continue”.
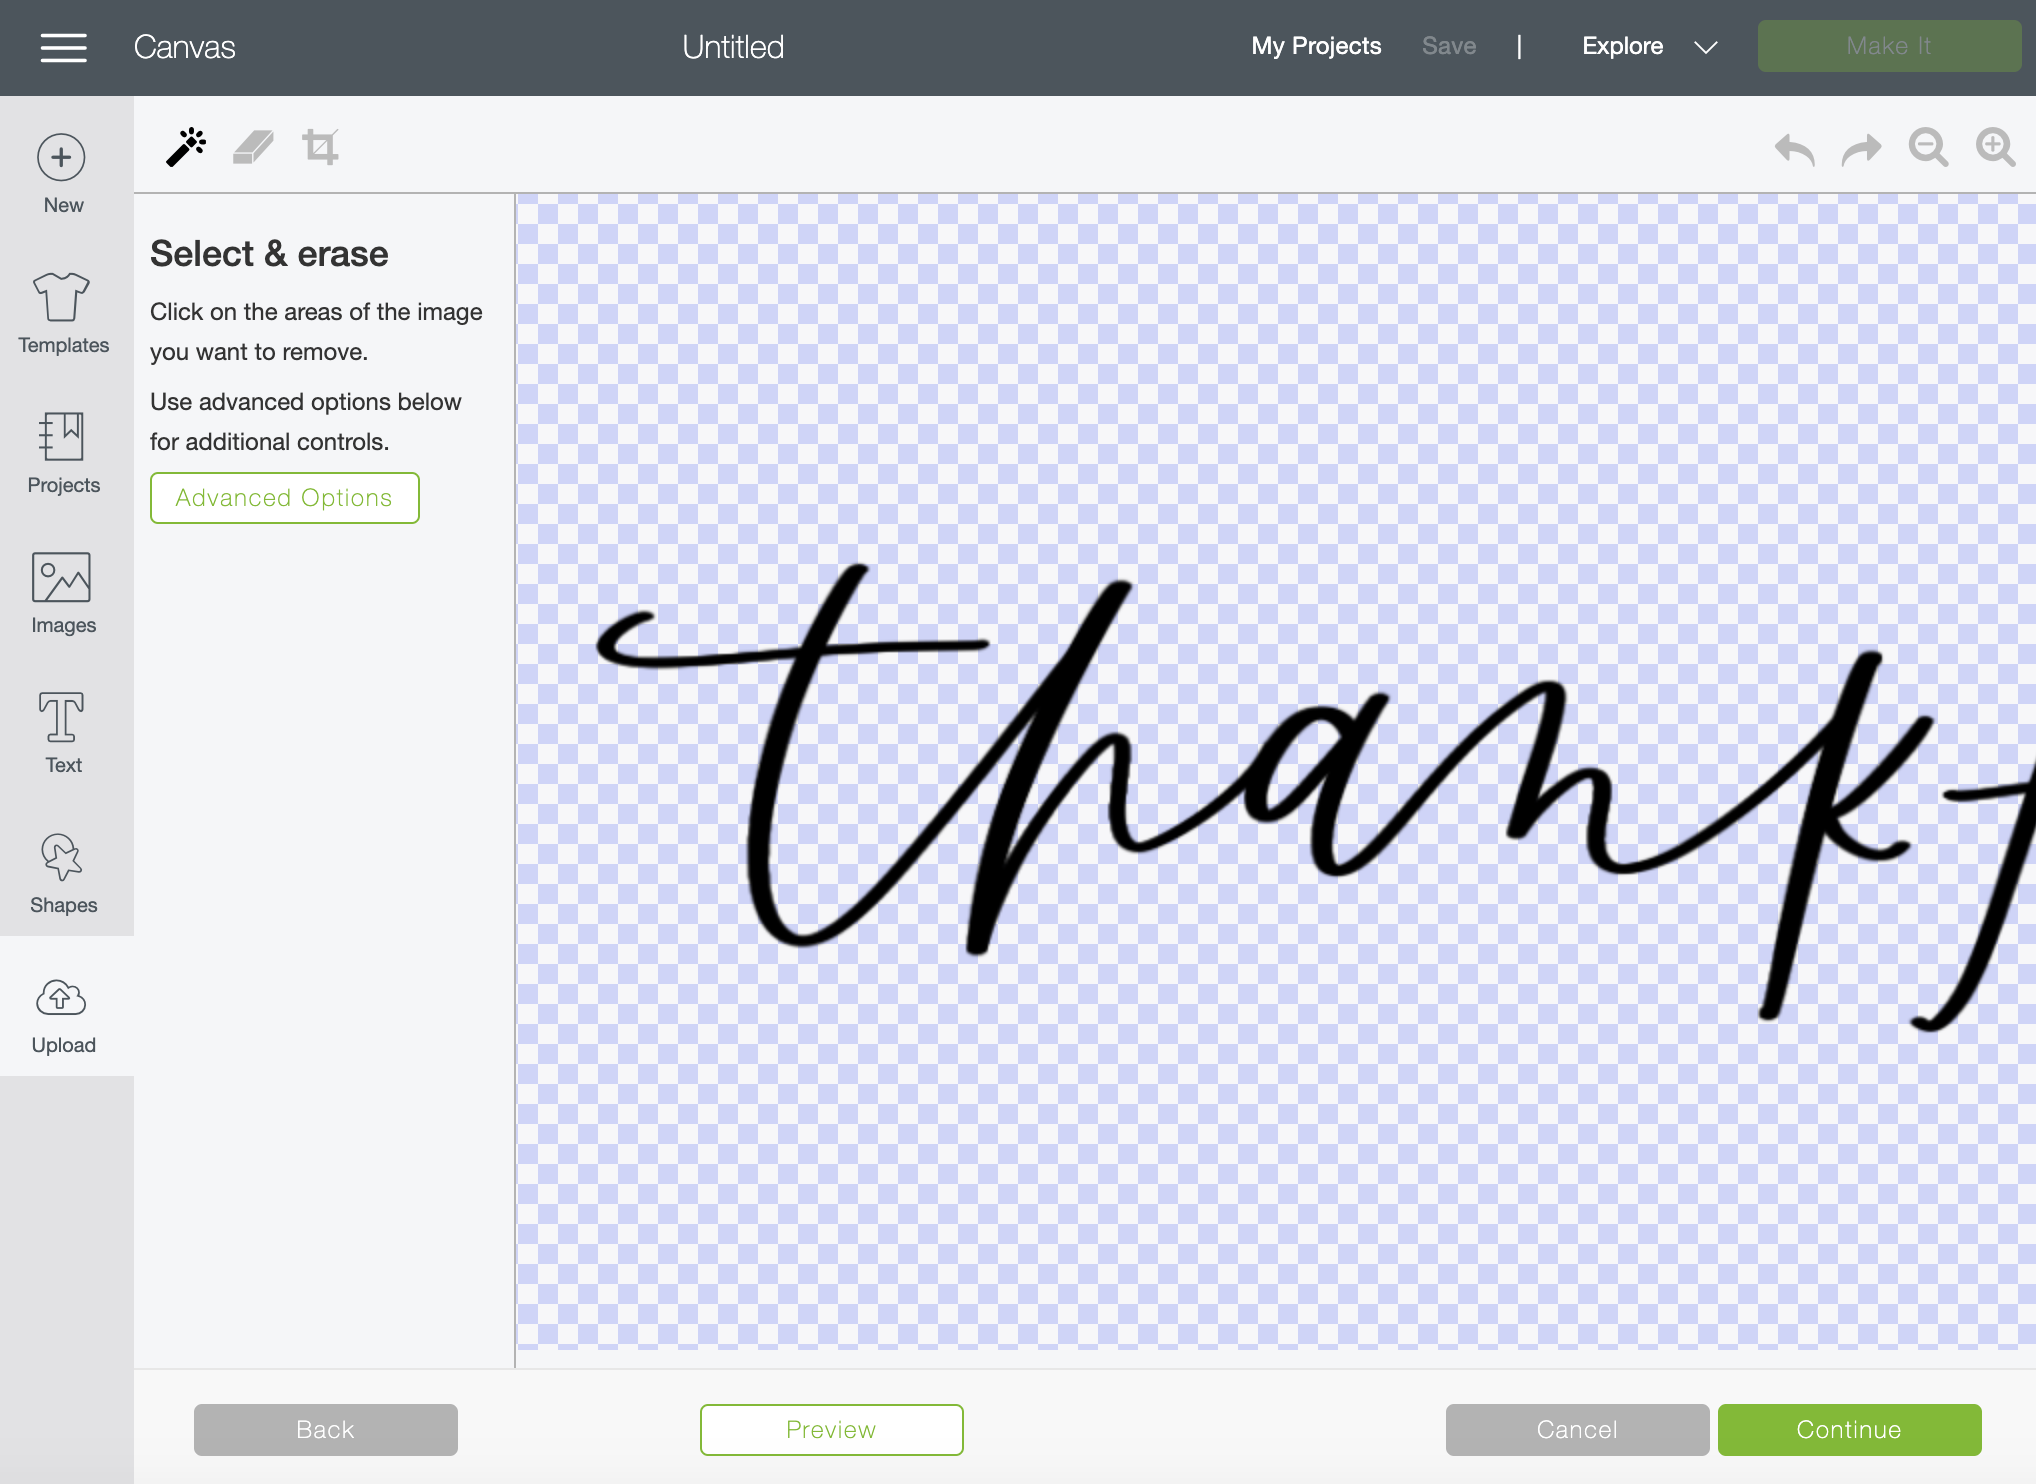
Save as a “Cut image” and “Save”.

Now you can upload the image to your Canvas in Design Space!
Click on your “thankful” image (it will be highlighted in green) and click “Insert Images”

Step Two: Measure & Cut
Go to your cutting board and use a ruler to measure the size you want your design to be. I chose 8” wide but you can choose whatever fits best on your own cutting board!

Go back to your Canvas in Cricut Design Space and adjust the size of your design to match the size you just measured with a ruler. I made my design 8” wide.

Once you’ve got the design the size you want on your Canvas, click “Make It” at the top!
Take a look at the preview window. Measure & cut your vinyl to fit the size you will need on the mat. I will need to cut my vinyl about 8.25” wide and 2.25” tall just to make sure I have the whole design covered.


Place your vinyl on the cutting mat & load it into your machine. Make sure your Cricut dial is set to “Vinyl”. Click “Continue”.
Take a sip of your cozy beverage & enjoy watching the Cricut work it’s magic!


Step Three: Weed
Once it’s finished cutting, remove your mat from the Cricut machine and grab your weeding tool.
Carefully peel back the extra vinyl from around your design, so that all that’s left is the letters.

Place a strip of transfer tape over your design & use the scraper tool to make sure it’s attached well. Gently peel back the transfer tape and your design should be attached to it as you peel it back.

Place your design on the cutting board. Use your scraper tool to make sure the letters stick to the wood.
Once it’s stuck on, gently peel back the transfer tape to reveal your beautiful design on the cutting board! Yay!

If you try this DIY be sure to share a picture over on social media using the hashtag #brittanylettering!
For even more ideas follow @brittanylettering , @officialcricut , and @expressionsvinyl over on Instagram!
I wish you and your family health & happiness as we close out the year! I am so very thankful for each of YOU!
Happy Thanksgiving & Happy Crafting!
XO Brittany